Internal Stair Installation – Day 1 and 2

The First Day of our Stair Installation
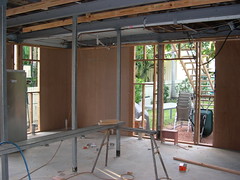
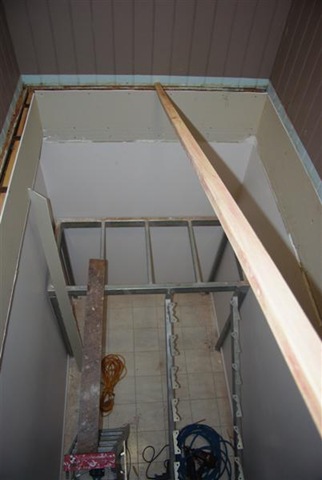
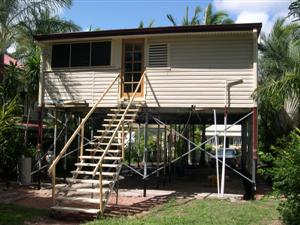
The first day of our stair installation saw the floor cut out of our old office area and the landing and lower stringers installed. They have also put the plasterboard over the gap between the ground floor and the first floor.

They were quite surprised at how well the walls all lined up. The only place really that they had some trouble was the back wall where the steam beam had been put up against the floor bearer. They have had to build out the plasterboard around that steam bearer to finish it off.

We managed to keep most of the mess out this time around with the taping that I did getting ready for the stairs to be installed. It made for an easier time when we got home from the day out, but we still had a bit to clean up.

Day 2 of the Stair Installation 
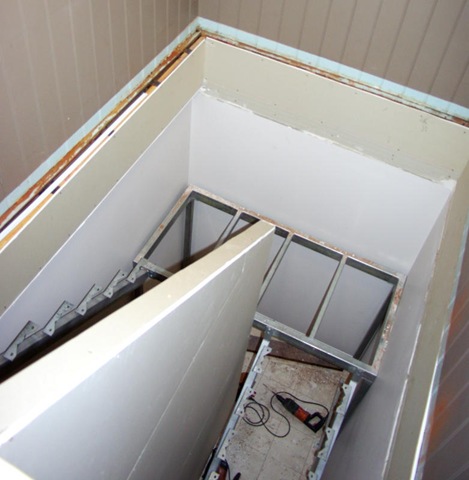
The second day of the stair installation saw the second run of stringers run up to the first floor. They have also built up the wall between the two sets of stairs.

As you can see in the photo the wall is built from the floor below right up to the top floor. It separates the two sets of stairs and will act as the banister for the top run of the staircase. The individual banister will then be attached to the new wall on the lower run of stairs.

Unfinished Hardwood Stair Treads 
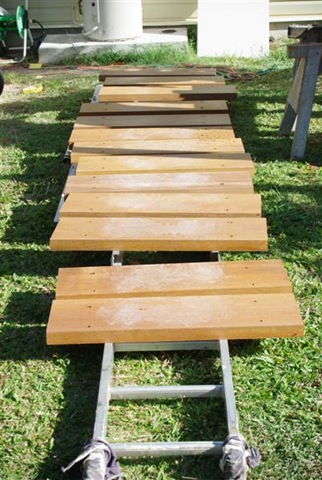
We have also had the hardwood stair treads delivered and cut today.

The timber used for the treads is Kwila. We will be finishing the treads so that they look similar to the timber louvers in the stairwell. It’s a soft natural satin finish, rather than the traditional high gloss polyurethane finish.

We will be using hardwood decking boards on the landing between the two sets of stirs, so it should come up looking really good by the end of next week.

Getting Ready for our Stairs

Preparing for the new stairs - top floor We have emptied out our office area in anticipation of the stairs going in. Glenn was just here checking it out and he said they will be ready to start cutting out the floor tomorrow morning at 7:00 am. They will be cutting out the floor in the area and dropping it down below.

After the mess that we experienced when they had to cut out the bathroom floor we aren’t taking any chances this time around. I’ve already put up a plastic sheet over the area separating the stair area from the kitchen, and before we leave tomorrow morning I’ll be sheeting up the entrance between the dining room and stair area.

We have gone with an open tread design on the stairs, as the cost is about half that of an enclosed staircase.

The landing and stringers were delivered this morning and I’m just waiting for the treads to be delivered so that I can get started vanishing them. Hopefully starting next week we will actually be able to live upstairs and downstairs in our house!

It will feel pretty amazing to finally get to that point.

Stop the Sway in a Queenslander

All Queenslanders are elevated and built on stumps. Depending on how high it is and on the construction methods used, sometimes the Queenslander homes can rock or sway, much like a boat does in a small swell.

Cross Bracing on the Stumps of our Queenslander 
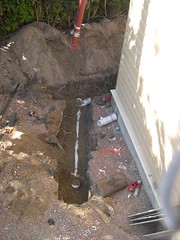
We noticed this sway quite a bit right after getting our house lifted. If our son ran around the house, or if I took a wide stance and rocked back and forth, we could get it going so the rocking was noticeable in a glass of water. The sway was the worst when we first moved in after the house was lifted, but slowly we got used to it. My wife, who was pregnant at the time, wasn’t too affected by it, which says a lot.

If you have a look at the first photo you can see some of the metal cross braces that were welded between the stumps to help minimize the sway. Even with those cross braces though, we still experienced the sway. For us though the cross bracing was temporary, until the house was enclosed, so permanent cross bracing may be more effective at stopping the sway of the house.

External Framing Back WallThe sway in the house didn’t finally totally go away until after we enclosed under the house. There are two trains of thought that I have experienced when it comes to bracing under the house when enclosing. One is to use bracing ply, which you can see in the photo on the right, and another is to leave some of the metal cross braces in and build around them. Most builders from what I can tell recommend a combination of the two, although we did all bracing ply as that is what our architect drew up with the plans.

Running Plumbing Through our Back Yard

Kitchen Drain Run Into the Back YardAfter sinking 50cm into my back yard a few weekends ago and loosing my flip-flop I figured that I would have a look at some old photos to see where the plumbing was run under our back yard.

If you have a look at the photo on the left I actually sunk into the mud pretty much directly over the top of the new kitchen plumbing drainage pipe that was run through the back yard.

When they ran the new plumbing drainage after lifting our house they put some of it into the concrete slab, but a large amount of the plumbing drainage was run under the ground beside and behind our house.

Plumbing Pipes Behind the House in the Back Yard

Because the climate here never gets cold a lot of the plumbing is run down the outside of the house. It is very different from what I grew up with in Canada, where everything had to be way under ground, or inside the insulated walls, otherwise they would freeze and explode.

Digging the Hole in our Back Yard for our PlumbingWhen they filled in the massive hole that they made for the plumbing in the back yard I don’t think that they compressed the soil at all. It was probably assumed that over time it would compress itself, but with the extremely heavy rains that we’ve been getting the soil over the plumbing just became so waterlogged that it turned into a sort of “quick sand”.

One thing that was interesting that we found out while planning the plumbing and drainage is that our neighbours sewer line actually runs through our yard for their second bathroom. This prevented us from having a larger deck, not that it matters any more though since we are no longer doing a deck.

Technorati Tags: , , ,