New Load Bearing External Bathroom Wall

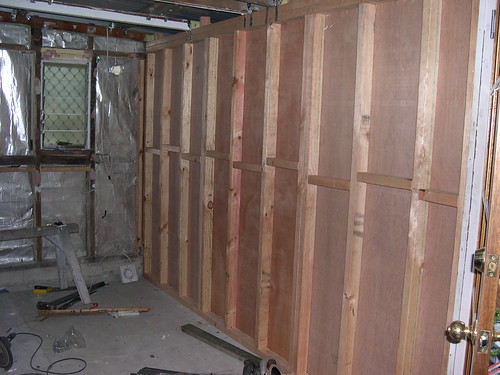
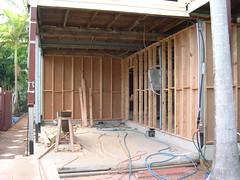
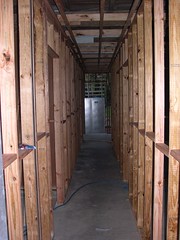
Bathroom Wall Completely RemovedYesterday they managed completely remove the exterior load bearing bathroom wall and build a new one, all in one day.

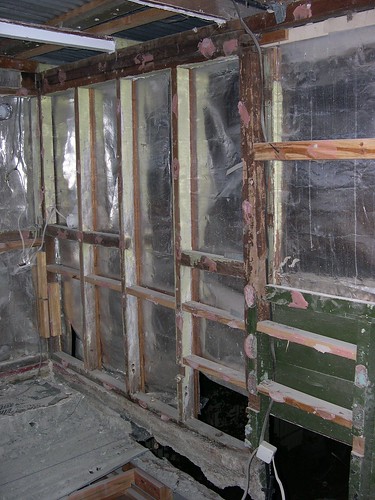
The old external load bearing wall in the bathroom had been cut in half in places and was sitting on the crumbling old concrete floor. It really had to be replaced since it was expected to hold up the roof in that back half of the house.

Sisalation Installed on Bathroom WallThey have not yet cladded the exterior of the load bearing bathroom wall, but the sisalation has been installed, as well as some ply to give it a bit extra rigidity.

The new wall looks a heck of a lot cleaner and stronger than the old one did. All of the wall studs go right from the top to the bottom of the load bearing wall, without being cut in half like the old wall was.

New Exterior Load Bearing Bathroom Wall

Technorati Tags: , , ,

Tying Down the Roof Trusses and Load Bearing Walls

To be honest I am so emotionally tired right now that I don’t really feel like writing anything, but I am hoping that this will help me to process a bit…

On Friday last week, if you recall, we found out that we need to replace the floor in our bathroom. This means gutting the entire bathroom and starting from scratch with a new bathroom floor, walls and ceiling.

I got a phone call this morning from our builder asking when I would be home, and suggesting that I bring a camera with me when I come to take a photo of something.

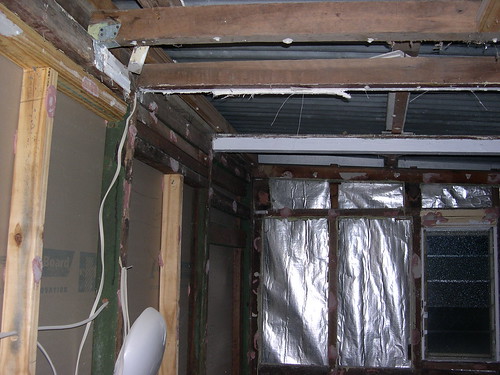
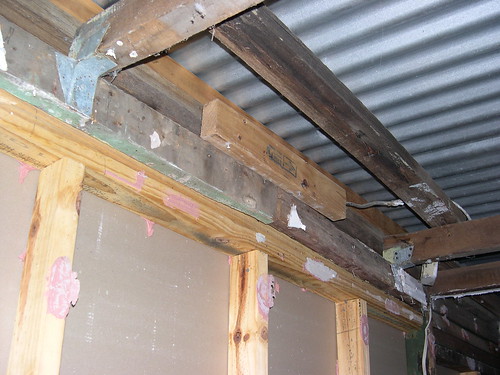
So I get there and he shows me how after removing the wall sheeting he can lift up the roof just by pushing on it ! Here is a series of photos of the wall frames, the roof trusses and the ceiling frame, I’ll explain more about the problems after you see the photos.

Load bearing internal wall - with non-structural timber Where are the roof truss tie downs Cut up load bearing wall with no roof truss tie downs

The top two photos show the wall between the dining room and the bathroom. Although it is an internal wall, it is a load bearing wall. Being a load bearing wall it should be made of structural grade timber (it’s not), it should have a large, high strength continuous beam running the entire width of it (it doesn’t) and it should be tied down to the roof trusses (again it isn’t).

The third photo shows the external wall, which is also a structural / load bearing wall. This is where our builder was able to lift the roof just by pushing up on it. The external wall at least has the continuous beam running the full lenth, and some of it is structural timber, but a lot of the wall framing has been cut in half to put in the louvers and the concrete floor, and again the roof trusses are not tied down to the top beam on the wall , and some of the trusses have been installed upside down.

With the roof itself there is also not enough support for the tin that is there . There is supposed to be either 60 or 90 cm between the timber under the tin (I can’t remember which at the moment), but on our roof there is nearly a metre and a half gap in some places!

Our builder reckons that most of these problems continue into the office area of our house as well. So he will be pulling down the ceiling in the office, which is sagging in a lot of places, and having a look at it.

I won’t know until tomorrow what this all means, but what I do know for sure is that the renovation costs are now due to blow out even more. We have already needed to change our expectations to where we won’t be moving in under the house anytime soon, so I don’t know what all these additional problems with our roof and load bearing walls is going to mean…

Technorati Tags: , ,

Council Approval for the Framing

External Framing GarageOur current builder started building under our house to the lockup stage on Monday, July the 9th. He had his crew of three guys working every day of that first week, only taking Sunday off.

On Tuesday July the 17th we received the “Compliance Inspection Report” from the Townsville City Council building certifier. The report indicated that “The building work complies with the Development Permit”.

So after only a week and day on the job the framing has already been completed and certified. They have already begun putting the sisalation on the outside of the frame, putting the insulation in the frame cavities that will be sealed up, adding the flashing and waterproofing the front verandah. We are getting ready for the plumber and electrician to come in on the end of this week / beginning of next week.

The only thing that looks like it might hold us up a bit is waiting for the windows to come in. Other than that things are running almost right on schedule.

Really makes me wish I had found this guy 18-months ago. We would probably be living down there already.

Hallway Renovation Framing Complete

Hall FramingThe framing on the hallway is now complete.

The hallway will be 96cm wide. It’s a compromise between the 90cm that the builder suggested and the 102cm that the architect suggested. There is no actual council regulation for the hallway width, so we went with the compromise of a 96cm wide hallway.

Because it is quite a long hallway we want to make sure that the hallway width didn’t actually feel too narrow. The hall is about 8.5 metres long, so as you can see in the photo is quite a long one and can feel a bit “tunnel like” if the hallway width is too narrow.

We spent a good deal of time tonight trying to work out the lighting for the hallway. I hadn’t actually thought too much about the hallway lighting up till now, so I would be very interested to hear what other peoples thoughts were on what kind of lights to put into a hallway.

Technorati Tags: , , , ,