Spa Bath for Sale

You probably have a week if you want to purchase our old spa bath. You can have the pump too, but it needs new seals in the spa bath pump as it leaks right now when you turn it on.

Old spa bath for sale

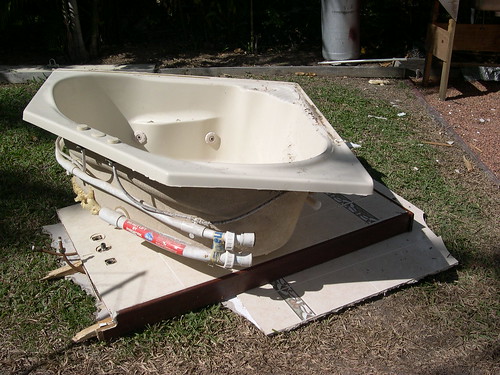
It’s a 1400 x 1400 cream coloured spa bath, which matching cream taps. Because I didn’t take it out I can not guarantee that all the pieces are still there.

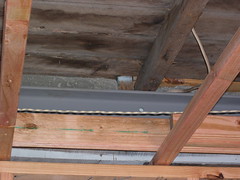
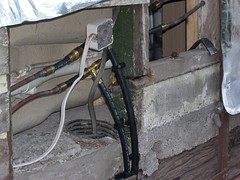
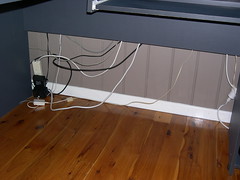
You can read a bit of the history about our spa bath in the acticle Why our Spa Bath Leaked.

If you want the spa bath you need to make an offer below in the comments and organize to pick it up yourself. Sorry, no shipping is available.

Bathroom Floor Repair Urgently Needed

We had an interesting and rather expensive day on Friday.

I got the following e-mail from Tamara while at work:

Ummm? The bathroom news doesn’t sound too good. I asked the builder to be honest with me and he made a few comments. I could tell he was trying to hold back. Apparently the whole floor has a cement layer underneath which over time will not be good for the joists underneath it. He has told us to PLEASE do the bathroom before we start sheeting in underneath.

They will fix the leaks as best as they can but some more plumbing work will obviously need to be done when we renovate it. I guess we should start looking at those show homes eh? Yeah, I’m a little stressed.

When I got home for lunch I talked with the builder myself, and it’s not a good story.

Sagging Bathroom Floor

Bathroom Floor Restigng on BearersThe bathroom floor is a concrete slab that weighs about 2.5 tonnes. The floor has no joists, bearers or reinforcement like rebar inside the concrete slab to support it. The only thing supporting the slab is about 5 cm of the slab that sits on the bearers on each. It’s bad enough that the builder told us he was nervous to get more than one or two people standing on it.

To add to the simple fact that the bathroom floor was constructed so poorly the plumbing was done all wrong as well and has probably been leaking for as long as the bath has been in there. The water hasn’t been dripping, which is why we didn’t notice it, but the water has probably been soaking into the bathroom floor, making it even weaker.

Closeup of Concrete Bathroom FloorWhen they poured the bathroom floor they used a cheap ready-mix concrete, which is why they reckon it was soaking in the water. Given how brittle the concrete is, I can believe it. The builder reckons that the whole job was just a DIY stuff up.

The only way to do the bathroom floor repair on this sort of floor is to get rid of the old bathroom floor and rebuild a complete new one. So that means that we will be moving out on Tuesday for about 1.5 weeks while they cut out, or jackhammer out the old bathroom floor, and then build an entire new bathroom.

Concrete Bathroom FloorThe new bathroom floor will have, if I can remember right, timber joists with 16mm villaboard on top. On that will be a waterproof seal with all of the joins being taped. Then we will be getting a new tiled bathroom floor on top of that, along with a new vanity and bath. The only thing that we will be able to save from our existing bathroom is the toilet.

Given the condition of the bearer that you can see in the photo it’s a surprise that the floor didn’t collapse during the house lift. The bearer is complete rotted out, but it is now reinforced by a steel beam run along beside it. I’m not sure if the builder will be replacing the bearer as well because of the new steel one, but we will see.

We had always talked about wanting to remodel the bathroom up here, but we were thinking cosmetic stuff like the bathroom tiles and vanity, and that was going to be down the track when we had a bathroom down stairs. But now, because of the fun with the bathroom floor repair being needed, we will be getting a new renovated bathroom sooner than later…

We will post more later about what we are thinking of doing to it. Maybe after we visit some show homes tomorrow.

Technorati Tags: , , ,

Council Approval for the Framing

External Framing GarageOur current builder started building under our house to the lockup stage on Monday, July the 9th. He had his crew of three guys working every day of that first week, only taking Sunday off.

On Tuesday July the 17th we received the “Compliance Inspection Report” from the Townsville City Council building certifier. The report indicated that “The building work complies with the Development Permit”.

So after only a week and day on the job the framing has already been completed and certified. They have already begun putting the sisalation on the outside of the frame, putting the insulation in the frame cavities that will be sealed up, adding the flashing and waterproofing the front verandah. We are getting ready for the plumber and electrician to come in on the end of this week / beginning of next week.

The only thing that looks like it might hold us up a bit is waiting for the windows to come in. Other than that things are running almost right on schedule.

Really makes me wish I had found this guy 18-months ago. We would probably be living down there already.

Organizing Cable Clutter

Computer Cable MessIn my last post I wrote about moving around our wireless access point and our cordless phone base station. The reason that I was moving stuff around was to organize our cable clutter.

As you can see in the photo on the left the cable clutter has gotten quite bad and some serious cable organization is needed.

One of the most interesting ways that I have seen suggested for organizing cable clutter is to actually use rain gutters to run the cables through. You attach the guttering to the back of the desk between the points that you need to run the cables and then the cables just sit in their.

A really cool feature of doing it like this is that if you have large enough guttering to use for to organize your cables you can even fit the power bricks and power strips into the guttering, assuming you have enough room between the desk and the wall to fit this sort of cable organization.

We don’t have enough room behind our desk for that sort of cable organizing, so instead I have some small cable clips taped under and behind the desk to organize the computer cables. I can run the cables through the clips, but I need to hide the power bricks between the desk legs and the wall. Two problems I have right now with this is that I have too many cables and the clips keep popping open, and the power brick for my wireless access point is too big to fit between the desk leg and the wall.

Tonight looks like it could be a bit of a frustrating one as I try to get these cables organized and hopefully out of sight.