New Load Bearing External Bathroom Wall

Bathroom Wall Completely RemovedYesterday they managed completely remove the exterior load bearing bathroom wall and build a new one, all in one day.

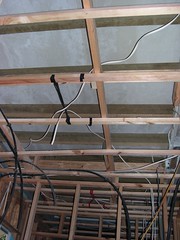
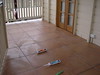
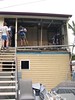
The old external load bearing wall in the bathroom had been cut in half in places and was sitting on the crumbling old concrete floor. It really had to be replaced since it was expected to hold up the roof in that back half of the house.

Sisalation Installed on Bathroom Wall
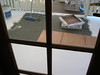
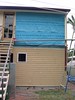
They have not yet cladded the exterior of the load bearing bathroom wall, but the sisalation has been installed, as well as some ply to give it a bit extra rigidity.

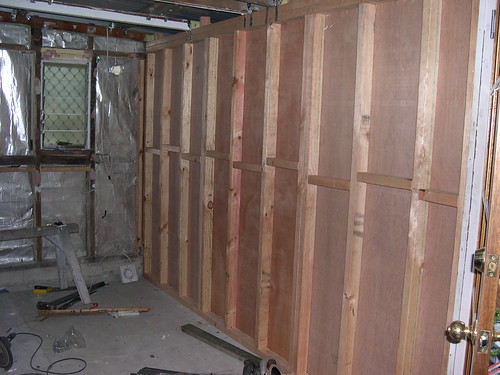
The new wall looks a heck of a lot cleaner and stronger than the old one did. All of the wall studs go right from the top to the bottom of the load bearing wall, without being cut in half like the old wall was.

New Exterior Load Bearing Bathroom Wall

Technorati Tags: , , ,

New Bathroom Floor Installed

Bathroom Villaboard Installed over New Floor JoistsThey have finished installing the new bathroom floor in our upstairs bathroom. After ripping out the old bathroom floor, it was good to see how quickly they got the new one installed.

The obviously started by putting down the new floor joists. They attached them to the bearer on the internal side of the bathroom, and then welded brackets onto the steel beam on the outside of the room and attached the joists to that.

It looked a heck of a lot more secure than the original bathroom floor did.

New Bathroom FloorAfter putting down the new floor joists they then put on 16mm villaboard. Villaboard is a material that is generally recommended for use in wet areas, as it is extremely resistant to moisture, and is very hard wearing.

They will be waterproofing the entire bathroom with a water proof membrane, hopefully before the weekend comes so that they can start tiling on Monday.

Technorati Tags: , ,

Front Veranda Tiles Laid

Watching the Tiler at WorkThey finished tiling the front veranda. As a matter of fact I sitting on the veranda right now as I post this article.

As I said in the Waterproofing the Front Veranda post we were a bit apprehensive at first about tiling the front veranda. We had nice hardwood timber on the deck and didn’t really want to cover it up. Now that the tiles are laid on the veranda though we are very happy with the look of the tiles.

Finished Tiling on our Front Veranda

It turned out looking really good, but it was a bit of a process to get it done. Here are the steps that I observed them doing to lay the tiles on our veranda:

  1. Leveling the Veranda for TilingFirst they water proofed the veranda
  2. They then needed to level the veranda where there were low spots
  3. Laid the tiles on top of the grout
  4. Grout the gaps between tilesGrout and Silicone the Veranda Tiles
  5. Installed a silicone expansion joint down the center of the veranda
  6. Finally seal up the small gaps between the tiles and the walls and posts

I think that they still need to put the skirting back against the side of the house, but that should be it. It’s turned out really good.

Because the tiles are quite a lot higher than the original timber decking the tiles are actually higher than the inside floor in a few places. I think that we will need to install a storm door seal on the two french doors and the main entrance door. That way we should be able to stop any water from flowing in off the veranda and into the house.

Tags: , ,

Waterproofing our Front Veranda

Front Varanda WaterproofingOur front veranda was originally a timber veranda. Because we are building internal rooms underneath it we are needing to waterproof the veranda so that the water can’t leak through.

We had been give some pretty poor advice previously that we could keep the timber and apply a heavy duty varnish to waterproof it, or we could not bother waterproofing it and actually add what was essentially a roof under the veranda so that the water that leaked through wouldn’t reach the rooms under it. Both of those were certainly not ideal, or even viable solutions.

What we decided to do instead was to tile the front veranda in order to waterproof it.

Waterproofing Products Used on our Front VarandaBefore you can apply tile to the timber veranda you need to prepare it. It’s not actually the tile that provides the waterproofing, it’s the products under the tile that waterproof the veranda.

First thing they did was to lay some villaboard over the timber and then apply some waterproofing products to the villaboard. The villaboard provides a solid and level surface for the tile and grout to adhere to once they are laid.

On all the seams of the villaboard they used what looked like a silicone or fiberglass based tape to seal the small gaps.

The most interesting product that I watched them use was the liquid flashing. It was a very heavy and thick paste that adheres to pretty much everything that it touches.

Liquid Flashing use for Waterproofing

We were very apprehensive at first about tiling over our hardwood timber veranda, but so far we have been impressed with the results.

There is more to come as the tiles get laid.

Tags: , , , ,