New Ikea 2019 Catalogue

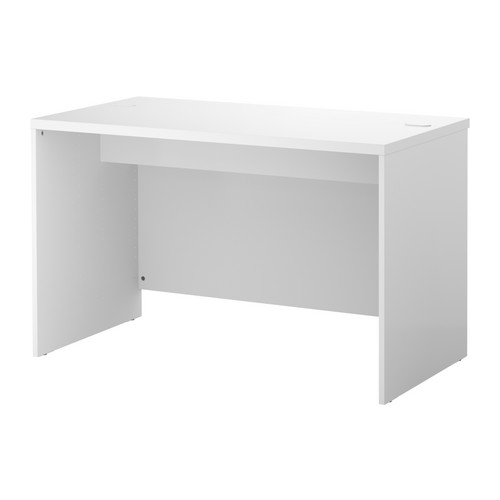
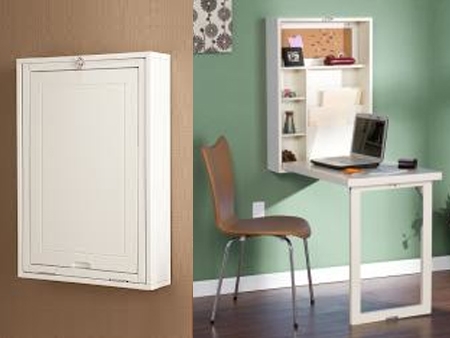
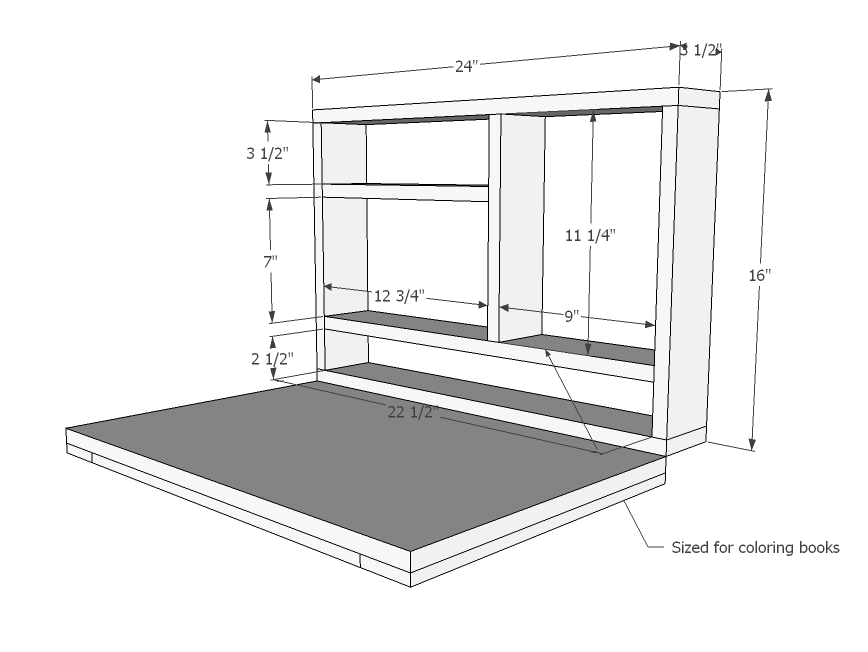
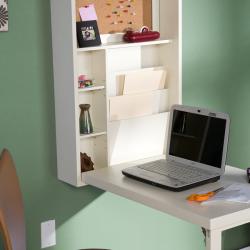
It’s always an exciting time of year when the new Ikea 2019 catalogue comes out. They are always full of interesting new European designs and furniture, and inevitably lead to a trip to the store.Already today we had the book

Already today we had it out looking at some options for our daughter’s bedroom. There are many different options for furniture and furnishings, and it’s fun to see what’s new …

Are there any new products from Ikea that interest you?

DIY Keyboard Tray for Ikea Besta Desk

Recently we purchased a white Ikea Besta Desk with the integrated cable tray under the back of the desk. The tray is great for organising cables and power boards.

Ikea Besta Desk White

I like the way that they cables and everything is hidden under the desk, but I ran into a lot of problems finding a keyboard tray for the desk because of the cable management outlet on the back. The first tray that I tried was the Ikea Summera Pull-out keyboard shelf. It was a good first choice since it’s only $15.00 in Australia, and it’s from the same store I bought the desk from…

Ikea Summera Pull-out keyboard shelf

The problem I had with the Summera keyboard shelf was the long steel rods coming out the back of the back of the keyboard tray. The only way I could have made it work is to have drilled holes through the front wall of the cable tray.

After failing with the Ikea Summera keyboard I tried a Fellowes Underdesk Keyboard Drawer from Officeworks. This keyboard tray was significantly more expensive than the Ikea tray at $70, but I thought I would give it a try…

Fellowes Underdesk Keyboard Drawer

Unfortunately the arms on the sides of this one was also much too long. If I were to install this keyboard tray it would have extended out past the front of the desk about 10cm, or 4″. It was pretty ugly, and didn’t fit my Logitech Wireless Mk550 Keyboard, which extended out past the back of the tray.

With only 34.8 cm between the front of the desk and the cable management tray I was pretty much stuck without option at this point for buying a tray. Since the desk is only 120cm wide I did really want a tray for my keyboard and mouse to free up some space on the desk. This pretty much left my only option as being a DIY solution …

Building a DIY Keyboard Tray

Prestige 300mm25kg Drawer SlideI headed over to Bunnings to pick up the hardware that I needed to build a keyboard tray. In the end all I had to pick up for two items:

  • White Melamine Shelf - 1200x300c16mm
  • Prestige 300mm/25kg Drawer Slide

The shelf cost about $12.50 and the drawer slide $7.00. So for less than $20 I was able to build myself a full width keyboard tray.

I cut the melamine shelf down to 1138mm (should have probably done it to 1135 as it was a bit tight, but still worked). After cutting it down I attached the tray part of the slides to the edges of the shelf.

Cut the Melamine Shelf to 1135mm

I then attached the drawer slides to the top holes in the side of the desk. Two of the holes lined up perfectly for the drawer slide, but I added two other screws (which were included with the drawer slides) to make sure it was secure. You could probably adjust this down one more hole if you wanted more clearance for your keyboard and mouse.

Attach Drawer Slide to Top Holes

In the end I finished up with a keyboard tray almost the full width of the desk, with plenty of room for notepaper, the keyboard, and the mouse, all for under $20.00! A much better deal than the Fellows Keyboard Tray, and much more functional than the Ikea Summa keyboard shelf…

Space Saving Fold-Out Convertible Desk by Dealfind

Space Saving Fold-Out Convertible Desk

I love this idea if you are limited in available space, but still need a small workstation in your house or apartment. Ikea used to have something similar to this, but even though it seemed to be quite popular, Ikea no longer sells it.

You can pick this up right now in Canada through DealFind for $150.00. If I was still living in Canada it is something I would have considered as a workstation for the kids.

wall-art-desk-fold-down-9_0

If you want a DIY version of a similar desk then Ana White has some great plans for a flip down wall desk that you can use. She makes it look easy, but I realise that with most of these projects what’s easy for someone else to do, might not be easy for me to do …

Update:

Just found this desk available in Australia for $251 over at Overstock.com. I do like it, but not that much!

White Fold-Out Murphey Convertible Desk

DIY Lego Activity Table with Storage – Ikea Hack

Lego Activity Table with Storage Ikea Hack

Although there are a few commercially available lego tables and activity tables most of them, unless ridiculously expensive, are quite small. Since my eldest son inherited all my Lego collection, plus had some of his own, we wanted a pretty big table, with a substantial amount of storage.

When we had to move out of our large office into a smaller one while we shuffled the kids rooms around before our third was born we no longer had room for both my wife and myself to have desks in the office. That left us with a 150cm x 75cm Ikea Vika Amon table top with no where to use it.

Thus was born my son’s Lego table!

The components used in building this Lego Activity Table were:

  • 1 x 150cm x 75cm Ikea Vika Amon table top
  • 4 x Ikea Trofast medium size storage boxes
  • 4 x Pre-cut coffee table legs and bases from Home Depot
  • 2.5m 1″ x 2″ fir timber
  • 3m 1″ x 1″ fir timber
  • Wood glue
  • 1 1/2″ standard nails
  • 2 3/4″ wood screws

We also decided to put a display shelf on his activity table, so to do this we got the 119cm wide EKBY JÄRPEN EKBY TÖRE table top shelf. It included the shelf as well as the two desktop mounting brackets to attach them to the activity table top.

Once we chose all the components that we needed for the table the construction was fairly straight forward, with only a few noticeable errors on my part …

Table Leg Attachment BaseTo fit four Trofast storage boxes under the Lego activity table the table legs will need to be installed as close to the four corners as possible. This was my first mistake as I initially installed the table legs in the same location that the previous Ikea Vika legs were installed. Woops.

After my initial mistake with the table legs I attached the metal base 2cm inside the outer edge of the table. This gave me enough clearance to fit all four Trofast storage boxes between the legs…

Timber Trofast Runners

My next step was to build the timber runners for the storage boxes. I choose fir because it was a much harder wood than pine, and hopefully would take a bit more of a beating as well…

I cut five 40cm lengths of the 1×2 and 1×1 timber and then glued and nailed them together to for the runners.

Timber runner installed in the centre of the tableWhile the glue was trying on the timber runners I found the exact middle on the table top and marked off the location for the centre runner. Once the runners were ready I then glued and screwed the first runner into place.

After attaching the first runner I then proceeded to install the other runners, carefully measuring the distance and making sure that the runners are perfectly square to one another. Close Up of DIY Trofast RunnersUnfortunately one of the runners I attached wasn’t exactly right and the storage box wouldn’t slide without getting stuck. Thankfully I found that out before the glue had dried and was able to remove it and try again, but it could have been a real mess had the glue dried.

After all the glue had dried and everything was lined up the four Trofast storage boxes slid in nicely, and then proceeded to fall right out the back of the storage table.

Rear stop for the Trofast storage runnersWoops again…

Thankfully I had some of the 1×1 timber left over so I cut four 10cm pieces and glued and screwed them at the back of the runners so that the boxes would stop sliding out the back.

At this point you could paint or stain the table legs to match the table top or other furniture in the room. We choose to leave it raw, mainly because we couldn’t agree on what colour or stain to use on it …

Bottom of the Lego Activity Table

Once that was finished and dried it was as simple as following the direction to install the EKBY JÄRPEN / EKBY TÖRE desk top shelf to finish it off and we were done. One DIY Lego Activity table with storage

Lego Activity Table with Storage Ikea Hack