After a few years of putting up with a smelly house every time I cook we finally decided to install an exhausted range hood. As I wrote in our last post, the challenge is that the range hood is installed on in internal half wall.
 I managed to get some help last weekend to get the range hood installed and it turned out really well, with a few surprises and unexpected twists like always.
My original plan was to simply take the doors off the cupboards and then use a 7″ hole saw to drill through the sides of the cupboards. Some of the challenges that we had are that we could not get a 7″ hole saw as no where that I could find actually rented them and I didn’t want to spend $70+ to buy one. Trying to use a jigsaw and a smaller hole saw didn’t work out too well.
Removing the Kitchen Cabinets
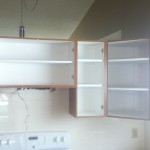
 After the failed attempt to cut the holes with the cupboards on the wall we decided the best thing to do was to remove the cupboards from the wall. This proved to be a bit harder than expected as instead of the expected silicone between the tiles and the bottom of the cupboard it was grouted, which caused a bit more time and effort to remove cleanly.
With the cupboards removed we were able to start the cuts in the sides and bottom of the cupboard with a smaller hole saw and then continue them with a jigsaw.
One thing that I was worried about when I started this project was putting a 7″ hole through the side of the house. I figured that with that size of a hole, and with my luck, I was sure to hit a stud in the wall. Fortunately though we were able to squeeze the pipe right beside a stud, without effecting the structure of the wall at all, which was great news.
Reinstalling the Cabinets and Running the Pipe
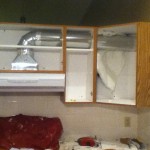
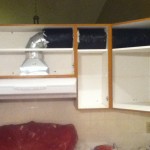
 Once we got the hole cut in the exterior wall we re-installed the cupboards back into their original position. We then installed the new range hood and measured and cut the long length of pipe, installed the outside vent and then ran it through from the outside of the house. We used lots of silicone on the outside of the vent hood to create a tight seal and screwed the vent to the outside wall. The rest of the pipe and fittings all fit together nicely and we screwed and taped all the joins.
Insulating the Duct Work
 Once that was done we spray foamed the exterior wall around the pipe and wrapped the pipe with duct insulation up to the 90 degree bend just above the range hood.
While insulating the duct work would have seemed quite absurd for our house in Australia, here in Canada it is quite a necessity. When the outside temperature drops to well below freezing you really need to everything possible to keep that cold air outside. The outside vent that we choose has a heavy baffle and there is a second baffle as part of the actual range hood.
At this point we flipped the switch on the breaker and tested out the new range hood, and boy does it suck! And by suck I mean pull a lot of air into the hood. The model of rangehood we got, NuTone Deluxe Allure® III, is rated at about 300 CFM on the “3” setting, and 430 CFM in boost mode, which is a lot…
At this point the range hood works, but it’s not too pretty yet, so the next step is to box in the duct work in the cabinets, which I will get to next time…