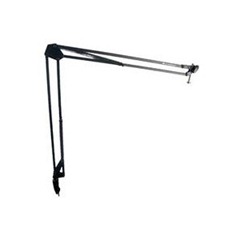
 When I first purchased my microphone for recording the YWAM News Podcast I had looked briefly at getting a table top microphone boom arm like the one on the left. I think that they are a great idea, a big space saver on the desktop and also help to put the microphone at exactly the right location for recording the podcast.
The problem that I had with them, and the reason why I didn’t get one, was the price, which seems to sit between about $75.00 and $150 for a mic boom arm.
Hack an Ikea Tertial Lamp into a Mic Stand
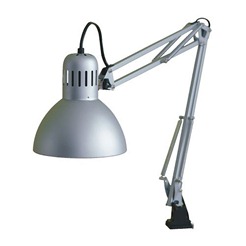
 I decided to have a go at hacking an Ikea Tertial desk mounted lamp into a Mic Stand. The lamp only costs $9.99 and is mounted to the edge of a desk.
To change it onto a microphone boom I first tried to remove the light fixture so that I could use it later. Unfortunately though there was no way for me to remove the light fixture without cutting the cord, so I cut it right up near the actual fixture and then slowly pulled it out the base end of the arm.
 After removing the cord I removed the lamp head just by unscrewing it from the boom arm, making sure to keep the bolt, wing-nut and the plastic spacer. That left a lamp free arm for me to attempt to attach to my Blue Snowball and Ringer Shockmount.
To do that I unscrewed the shockmount from the table top base that came with the microphone. I had to file the plastic spacer down significantly for it to fit around the base of the shock mount. After trying to file down the plastic space for quite a while I ended up having to take a drill to it and really jam it into the end of the arm.
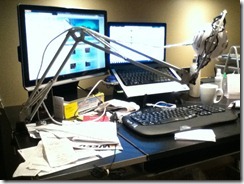
 The bolt and nut from the lamp head fit in with new microphone and shockmount, so I just used them to attach the shock mount and boom arm together. Although it isn’t in the photos I used cable ties to attach the USB cable to the boom arm.
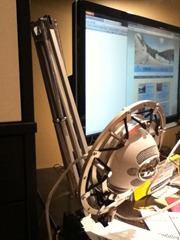
I’ve found a few other people online who have done this Ikea hack. Unfortunately the combination of the Blue Snowball with Shock Mount, and the boom arm from the Ikea Tertial boom arm weren’t quite as good a fit as I had hoped. As you can see from the photo the base of the shock mount actually hits the frame on the boom arm, so I can not tilt the microphone back past 90 degrees. This is a bit of pain since the boom arm doesn’t extend so it’s parallel to the desk, so the best I can do is about 70 degrees, which isn’t ideal for recording.
My mic combo is also very heavy. I’m finding that each time I extend the arm I have to tighten the other nuts and bolts in the arm with a screw driver so that it doesn’t fall to the desk. My next step will be to buy some heavy duty hardware from Home Depot to replace the stock nuts and bolts in the arm.
I’m also hoping to purchase a pop filter for the microphone to help improve my YWAM Podcast recordings. This will increase the weight of my mic combo even more, which will definitely make the upgraded hardware even more important.
The original lamp only cost $10 and the upgraded hardware should be less than $10. I figure that for $20 it’s a pretty good deal for a microphone boom arm, even if it isn’t the perfect solution.
Thanks for all the info. I do a bit of podcasting myself- I have a little blue snowball microphone and it works great for me.
Thanks for the feedback Marianne. I’m glad that it worked for you.
Did you get the upgraded hardware? Home Depot didn’t have the right size wing-nuts so I haven’t upgraded the nuts and bolts on mine yet.
Great and CHEAP DIY pop filter…
1 small needle point frame – 4.95 USD
1 pair of nylons – 1.00USD
1 wire coat hanger – Free at your local dry cleaners
Pull the nylons over the small ring of the need point frame, fit the larger frame over the smaller one and tighten. Snip off about 8 inches of the hanger working on end on your mic stand and the other around the fastening screw of the needle point frame.
Thanks for the advice Chris.
Have you made one of these yourself? How effective is it compared to a commercial pop filter?
Yes Bill… Used to be that pop filters could easily cost you 50-60 USD… I was a struggling college student and couldn’t afford that so… I raided my grandmother’s needlepoint kit one day and the 10 buck pop filter was born…
One trick is to double up on the nylons if you find the the filter is not meeting your requirements for plosives mitigation… Love using fancy words. 🙂
I have always been quite pleased with the results compared to a 40$ filter…
I have also made one out of the hanger and nylons as well… Just add a rubber band.
Pingback: Turn a desk lamp into a swinging mic stand - The Red Ferret Journal
How did you make the shock mount? It is hard to see in the picture but great idea. I am also a Ham Operator and this will be good for that also.
Unfortunately I can’t claim credit for the shock mount, I got it with the microphone.
I did a search for you though and found this great tutorial on making a spider shock mount. It wouldn’t work for my microphone because of the shape and size, but it would work with most standard shaped microphones.
– http://www.homestudioguru.com/1443/diy-microphone-spider-shock-mount/
One thing you must be careful of when adding heavier duty springs, is that the lamp hardware can handle the addition stress. I picked up a great mic mount on fleabay for under $50 (USD), nice heavy duty system. I also built a pop filter to deal with plosives. http://www.billmecca.com/quicktips-dealing-with-plosives/
The springs seem strong enough, I’m mainly just looking at replacing the nuts with easier to tighten wing nuts. The hardware that is there is “almost” strong enough, but I need to tighten them every once in a while with a screwdriver.
I liked your video on the link. I’m going to try to pick up an Embroidery ring and some panty hose this week to build the pop filter.
lots of stands like this are available for around 23 bucks on ebay and dealextreme…
Exhibit A:Â http://dx.com/p/nb-35-360-degree-rotatable-metal-recording-microphone-stand-blue-black-241913