After cutting out the driveway and laying down the roadbase the guys came back to pour the concrete.
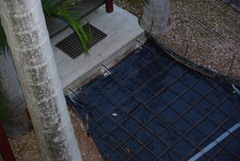
 Before they could pour the concrete they put down a black plastic membrane. From what I understand the plastic membrane is meant to provide a moisture barrier between the ground and the concrete. They did the same thing before they poured the slab for under our house.
To help attach the new driveway to the existing slab under the house and at the bottom of the stairs they drilled holes into them and rammed steel rebar into them. The embedded steel rebar helped to create anchor points for the new driveway.
 To lay the steel over the plastic membrane they put down dozens of small plastic cones. The plastic cones elevated the steel mesh about 75mm above the plastic. The steel mesh clicked into the plastic cones.
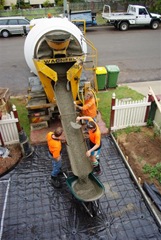
Once the steel was in place they poured the concrete into the formwork they had put around the outside of the new driveway. They used wheelbarrows to cart the concrete down the side of the house. Trowels were used to then flatten out the concrete, give it the right shape and depth, and make sure that the fall on the garage is away from the house.
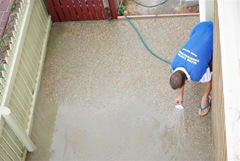
 After a few hours of drying time the crew came back to spray off the top layer of concrete . This revealed the pebbles on top to give the driveway the pebblecreate / aggregated look.
A few days after they were finished I spent the morning painting and sealing the new driveway. The clear sealant that I used on the driveway should make it easier to wash off any drips from the car, and it gives the driveway a permanent "wet" look, which is very effective.