Finishing Installing a New Driveway

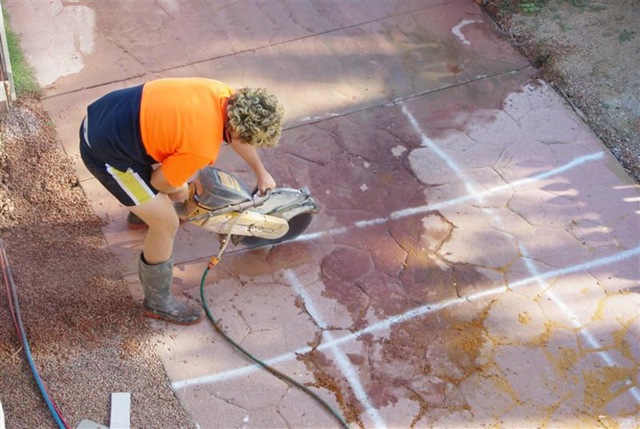
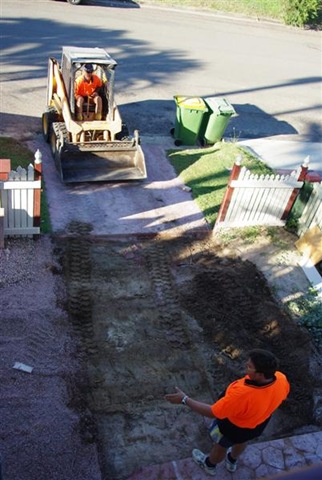
After cutting out the driveway and laying down the roadbase the guys came back to pour the concrete.

Steel Mesh Laid over Plastic Membrane 
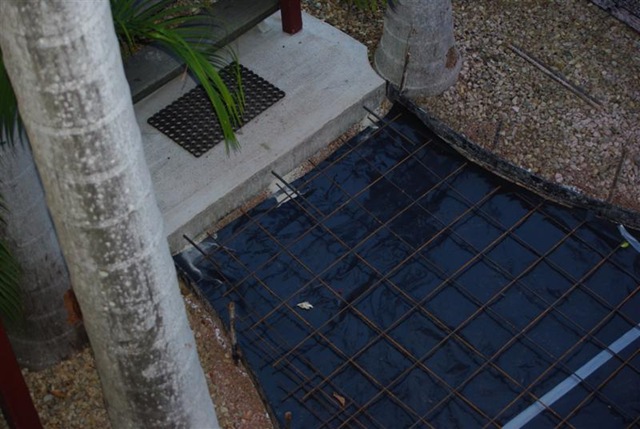
Before they could pour the concrete they put down a black plastic membrane. From what I understand the plastic membrane is meant to provide a moisture barrier between the ground and the concrete. They did the same thing before they poured the slab for under our house.

To help attach the new driveway to the existing slab under the house and at the bottom of the stairs they drilled holes into them and rammed steel rebar into them. The embedded steel rebar helped to create anchor points for the new driveway.

Pouring the Concrete for the Driveway To lay the steel over the plastic membrane they put down dozens of small plastic cones. The plastic cones elevated the steel mesh about 75mm above the plastic. The steel mesh clicked into the plastic cones.

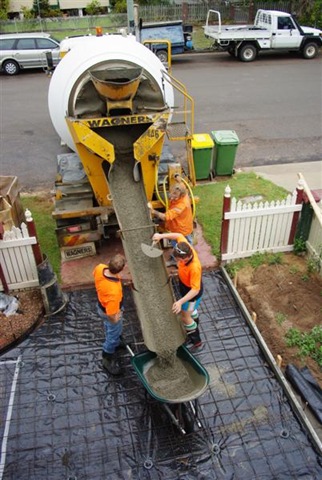
Once the steel was in place they poured the concrete into the formwork they had put around the outside of the new driveway. They used  wheelbarrows to cart the concrete down the side of the house. Trowels were used to then flatten out the concrete, give it the right shape and depth, and make sure that the fall on the garage is away from the house.

Revealing the Aggregate Pebbled Driveway 
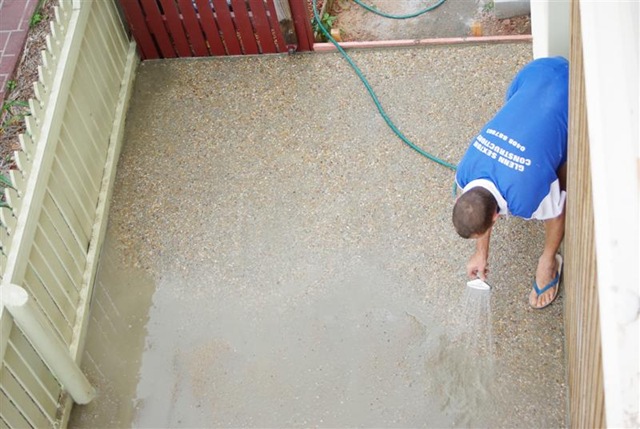
After a few hours of drying time the crew came back to spray off the top layer of concrete . This revealed the pebbles on top to give the driveway  the pebblecreate / aggregated look.

A few days after they were finished I spent the morning painting and sealing the new driveway. The clear sealant that I used on the driveway should make it easier to wash off any drips from the car, and it gives the driveway a permanent "wet" look, which is very effective.

Preparing the Site for a Driveway

Before they could start putting in our new driveway they had to prepare the site.

Cutting Through the Contrete on the Old Driveway The first step for this was to cut away the old driveway and remove it. Because of the height difference between the old driveway and the garage they only cut away the first half of the drive.

As you can see in the photo on the left they made followed a very systematic approach to cutting up the old concrete. They made pretty quick work of it too using the concrete saw.

Removing the Old Driveway with a BobcatIt became clear why they were so precise with the cutting up of the driveway when the bobcat arrived the next day. It probably only took the bobcat about 15-minutes to remove the concrete driveway pieced and drop them into the skip that was delivered.

They then used the bobcat to flatten the area down a bit before dumping a few cubic metres of gravel roadbase / crackadust down and levelling it off. This will provide the base that the concrete will be poured onto when that gets delivered tomorrow.

Our Finished Open Tread Staircase

Our Open Staircase with Metal Frame and Timber TreadsI had a comment from a friend that in the last photo that I took of the staircase you couldn’t actually tell that it was an open tread design for the stairs. They were a bit surprised about what it looked like when they saw it in person.

So here is a photo I just took of the staircase from below. You can much more easily see how the open tread design looks.

The area under the stairs will make for some great storage, but because of the open treads we will have to make sure to keep them nice and tidy.

One thing about the rich colour of the stairs is that they make for some great photo opportunities with the kids …

Kids on the Stairs

Owner Builder fined $1500 for no Licence

In some recent inspections of building sites around Townsville the inspectors issued three fines to people doing work without the proper licence. This is a reduction from the last time that they did the inspections of licences when they fined a lot more people for improper licensing.

All three of the people fined for not having the appropriate licence were all working on the same owner builder’s building site.

The owner builder himself did not have an owner builder’s license. An owner builder license is required for any work where the total material and labour cost would exceed $15,000 if done by professionals. The owner builder course is a relatively short course that I had to do before starting the work on our house.

There were two other carpenters working on the same house that were also fined for not having the appropriate license for the work they were doing.

To avoid getting fined for improper licensing of tradespeople you should make sure to do the following:

  • Check the license of any and all contractors that you hire
  • Always check if you need a license before starting any building, renovation of home improvement projects. Even a seemingly small project like putting in a shed requires council approval in some parts of Australia (including Townsville)

If you are unsure about any of the licensing, and if your contractor does have the proper license it would be worth giving a call to the local building authority. Here in Queensland you can check out any licensed trades person on the BSA web-site as long as you have their license number.