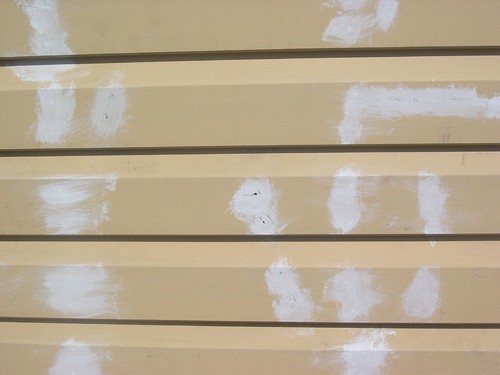
 When our Builder here in Townsville put the timber cladding on the house they used a heck of a lot of nails. Although the timber weatherboard cladding came pre-primed, we still had to prepare the cladding prior to painting.
It was a five step process to prepare the timber cladding for painting.
- Putty over all the nail holes and large knot holes
- Scrape back the putty after it has dried
- Sand the putty so that it is flush with the timber cladding
- Use a flexible gap filler (like No More Gaps) to fill in the cracks. These cracks were where the different timber cladding boards met, at the corners and around the door frames.
- Apply a primer over the putty to seal it.
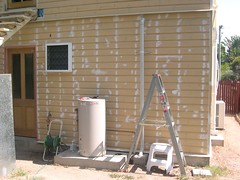
If you have a look at the photos you can get an idea for how much work it actually took to prepare the timber cladding for painting.
Tamara’s dad ended up doing the majority of the work (Thanks Ken), and I worked mostly on the weekends. It took us a few weeks to get it done, but finally we are now ready to paint the timber cladding.
Technorati Tags: painting, timber cladding, weatherboard
Now you have done a “new” instalation, you want to try a house that’s 100 years old and has 5 layers of paint!!
To be honest Doug I don’t think that I would even want to really consider it.
I’ve seen some people spend months scraping, puttying, filling and sanding. Not to mention replacing old siding that may need it.
I am just glad that our first floor was aluminium siding. At least that shouldn’t need painting for many years to come.